Wednesday, October 27, 2010

Pistachio Cake

This recipe is very much like the Easiest Chocolate Cake I made a few weeks back.  Which by the way got rave reviews from the people I baked it for.  I am baking this recipe for the same people, we'll see what they think!!  I tasted it and it's moist, a nice green color, and deliciously nutty!! If you love pistachios you will be sure to love this one!!!

Pistachio Cake or Muffins
1 box Classic Yellow Cake mix
8 oz. whole shelled pistachios, grounded. (Be sure to reserve 1/2 cup for decoration on top of the frosting)
3 eggs
1/3 cup vegetable oil
1 1/3 cup water
1 package Pistachio Flavor JELL-O (not prepared)

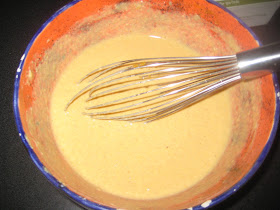
Preheat the oven to 350 degrees. Put aside 1/2 cup of the ground nuts aside for later. Mix the rest of the ingredients together in a bowl, whisk to combine well, and pour into a loaf pan, muffin tins, etc.  Bake until a cake tester comes out clean and golden brown.

I made 24 mini muffins, and still had left over batter for a 9x9 inch brownie pan. I cooked the mini muffins for 25 minutes and the cake for about 40 minutes. I frosted the mini muffins with Vanilla Bean Frosting.  The frosting is made with confectioner's sugar and Earth Balance Natural Shortening, it's like a vegan version of butter for baking. (Make sure to get the green package, the other one contains salt.) 
I am not frosting them yet, because I want it to be fresh, but here is the recipe for the Vanilla Bean Frosting.  It can be made vegan if you use non-dairy soy milk and vegan natural shortening!!

Vanilla Bean Frosting
2 cups confectioner's sugar (if you want a really sweet icing add more sugar, to taste)
1 cup butter OR Earth Balance Natural Shortening (at room temp.)
1 teaspoon Vanilla Bean Paste (OR vanilla extract w/the beans of a vanilla bean scraped out)
1 tablespoon milk or soy milk (can be vanilla flavored)

Blend ingredients together and frost cupcakes just before serving.  Sprinkle some ground pistachios on top! (You should have about 1/2 cup leftover from the cake recipe!)

Tuesday, October 26, 2010

Pumpkin Pancakes

When I got home from work today, I was craving something sweet yet filling, and I remembered I had a little pancake mix left in the pantry.  I also had a can of pumpkin that I've been saving to make a pumpkin bread pudding.  I had just come back from the store and had all the ingredients for the bread pudding so I began to prepare it.  Then I had an idea to take a little of the pumpkin puree and mix it into the pancake batter.  I've seen recipes for pumpkin pancakes around the web but never tried it. So, I went for it! 

Pancakes were the perfect sweet and filling meal to have!  I'm considering it as my dinner...because who doesn't love breakfast for dinner?!  And I even saved one for lunch tomorrow! Now I'm pretty sure you can use any pancake mix that you have on hand and just follow this recipe.  I added chocolate chips to mine but you don't have to. This recipe can be doubled, tripled, etc.  Also, if you want more of a pumpkin taste, try adding more pumpkin and let me know how it comes out!

Pumpkin Pancakes
(makes 4 large pancakes)
1 cup of any pancake mix
1 egg
1/4 cup pumpkin puree
2/3 cup milk
1 tablespoon vegetable oil
chocolate chips, about 1/4 cup (optional)

Mix all ingredients, except the chocolate chips, together in a bowl and whisk until smooth.  If the batter seems too thick for you add a little more milk and whisk it in.  Place a non-stick pan greased with non-stick spray or butter over medium heat.  Pour about 1/4 cup of batter  in the pan and let cook until bubbles form, 2-3 minutes, then flip and cook the other side for an additional 2-3 minutes, until golden brown.  (If you are using chocolate chips, sprinkle them on pancake after pouring the batter but before bubbles form.)   Enjoy with your favorite syrup!

Monday, October 25, 2010

Egg in a Hole

I was browsing through the list of blogs I read daily and saw this great idea on Proud Italian Cook.  I had actually purchased an acorn squash at the Farmer's Market a few days prior and thought it would be a perfect weekend breakfast!

Egg in a Hole
(Serves 4 people)
1 acorn squash, sliced into rings, pulp and seeds removed (save the seeds for roasting later)
salt and pepper, taste
1/4 cup olive oil
4 eggs
parmesan cheese, for sprinkling on the egg

Preheat oven to 400 degrees.  Place acorn rings in a bowl with half of the olive oil, salt, and pepper.  Coat all the rings and place on a greased baking sheet.  If you want to reserve and roast the seeds, place them in a corner on the baking sheet, toss with olive oil and salt.  Roast for about 30 minutes. (Roasting time for the seeds may be shorter)  Roasting the squash can be done the day before.
 When you are ready to cook the eggs, place the rest of the olive oil in a heated pan and place the roasted acorn squash in the pan as well. Crack an egg in each acorn hole, add salt and pepper to the egg, cover and cook to your desired egg consistency.  I like my egg over easy, so I flipped the the egg over once.  Serve with a sprinkling of grated parmesan cheese and a piece of toast! ENJOY!

Thursday, October 21, 2010

Dairy-Free Pumpkin Pie

Thanksgiving is around the corner and pumpkins are in season now, what better to make than pumpkin pie???  It's my all time favorite pie, and I make a damn good one!  And for all you kosher people, this recipe is dairy free, made with pareve margarine and pareve vanilla soy milk.  Westsoy makes a great one!  I made this dessert for my 100th post celebration because I am scheduled to do a cooking demo in November and I'm planning to show some Thanksgiving recipes and needed to try it out beforehand.  So here you go...

Dairy-Free Pumpkin Pie Sugar Crust
(makes crust for 2 pies)
1 1/2 stick unsalted pareve margarine, room temperature (I use Fleischmann's)
1/3 cup sugar
1 egg
1/2 teaspoon vanilla bean paste OR good vanilla extract
2 cups all purpose flour

Cream margarine and sugar in a bowl with a hand mixer until light and fluffy, about 3 minutes. Add egg and vanilla to margarine mixture, mix until well combined.  Add flour slowly to mix, and mix just until combined.  Use hands to form dough into 2 balls, cover both with saran wrap and place in fridge for 2 hours.

NOTE: I think this recipe works best using a tart pan rather than a pie dish, if you choose to use a pie dish, cooking time will be longer and dough might get more browned, but it should still be fine!

Non-Dairy Pumpkin Pie Filling
(makes enough for 1 tart)
3 eggs
1/2 cup brown sugar (light or dark)
1/4 cup sugar
1 15-ounce can pumpkin puree
1 tablespoon vanilla bean paste (optional)
1/4 teaspoon cinnamon
1/8 teaspoon ginger (optional)
1/8 teaspoon nutmeg (optional)
1/4 teaspoon salt
1 cup vanilla soy milk (non-dairy)

In a large bowl, combine eggs, brown sugar, white sugar, vanilla, spices, and pumpkin puree.  Mix until well combined, using a hand mixer. Add soy milk.  Mix to combine. Set aside.

Remove 1 dough ball from fridge and flour your work surface.  Roll the dough out into a large circle. Place dough over a greased tart pan and use fingers to pinch it in around the edges and bottom of the pan. Place tart shell on a baking sheet and pour pumpkin filling into tart shell almost to the top.  Bake in the oven at 350 degrees for about 45 minutes. The pie is ready when the middle is set and not jiggly.
If you have leftover pie filling and dough make mini pumpkin pies.  If you don't have leftover dough but have the filling, you can make a pumpkin bread pudding.  Pour batter over challah or bread chunks in a greased baking dish and bake for about 40 minutes.  Or you can pour pumpkin filling into greased ramekins and make pumpkin pudding by baking them for about 30-40 minutes or until firm in center.

Wednesday, October 20, 2010

Shakshuka

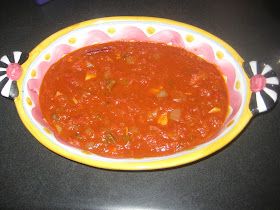
Along with the Potato and Feta Bourekas I made Shakshuka.  This is a dish that consists of eggs baked in a sauce containing tomatoes, peppers, onions, and spices.  It originated in Tunisia but is a very popular Israeli breakfast.  If you live in NYC there are a few restaurants that serve a mean shakshuka. Hummus Place and Hummus Kitchen are two places that I know of.  I originally got the idea of making this dish when my friend Kim sent me a link from Smitten Kitchen.  It seemed pretty easy and I remember loving this dish when I was young and spent summers in Israel.  Not only is this meal delicious and easy to make, it's super healthy and low in calories too!  I basically followed Smitten Kitchen's recipe with a few minor changes and I doubled the recipe too.

Shakshuka
(makes enough sauce for 1 dozen eggs)

1/2 cup olive oil
3 Jalapenos, chopped

2 large onions, chopped
2 red peppers, chopped (optional)
2 green peppers, chopped (optional)
3 dried spicy red chilles, broken in half
10 cloves garlic, crushed then sliced
2 teaspoons ground cumin
2 tablespoons
spicy paprika (you can use regular paprika too)
1 tablespoon crushed red pepper flakes (omit if you don't like it too spicy)
2 28-ounce can crushed tomatoes, undrained
Kosher salt, to taste
12 eggs
1 tablespoon chopped flat-leaf parsley, for sprinkling
Warm pitas, for serving


Heat oil in a 12-inch skillet over medium-high heat. Add jalapenos, chiles, onions, and peppers and cook, stirring occasionally, until soft and golden brown, about 6 minutes. Add garlic, cumin, and paprika, and cook, stirring frequently, until garlic is soft, about 2 more minutes.
Add crushed tomatoes and their liquid to skillet along with 1 cup water, reduce heat to medium, and simmer, stirring occasionally, until thickened slightly, about 15 minutes. Season sauce with salt.
Crack eggs over sauce so that eggs are evenly distributed across sauce’s surface. Cover skillet and cook until yolks are just set, about 5 minutes. Using a spoon, baste the whites of the eggs with tomato mixture, being careful not to disturb the yolk. Sprinkle shakshuka with parsley and serve with pitas, for dipping. Enjoy!

The recipe says to bake the eggs in a skillet, however if you don't have a large enough skillet, you can do what I did.  I made the sauce in a large pot and then transferred the sauce to a baking dish, placed the cracked eggs in the dish, and baked for about 10 minutes in a very hot oven, about 400 degrees.  Serve and Enjoy!

Whoops I forgot to take a photo of the finished dish, sorry, my friends were hungry and I was overly excited!!

Tuesday, October 19, 2010

Happy 100th Post!!

It's finally here!!  My 100th post!!  I celebrated this past weekend with a bunch of friends and now it's time to write all about it.  Sorry it took me so long to get it up!  Anyways, I can't believe it's been nearly 8 months of blogging!  I've had one giveaway and a couple of shout outs on Mile-Posts, a blog written by my runner friend Dorothy, and I'm scheduled to do a Thanksgiving-themed cooking demo in November!

I've cooked and baked more than ever before and have fed a lot of friends and family, and of course sisters (and brothers).  I've thoroughly enjoyed all your comments, suggestions, and ideas on the blog and on my Facebook fan page!  Please keep up all the good work and continue.  Also, if you make any of my recipes I'd love it if you could upload pictures to the FYS Facebook page.

I am currently at 192 Facebook fans.  My goal is to get many more fans and to do that I need your help!!  Please visit the page, you can access it by clicking here.  Once you are there under the profile picture (Which is a picture my new apron that I got as a gift from my friend Sarah at my 100th post celebration.) there's a link that says Suggest to Friends.  When you click on that you can invite friends to join Feed Your Sister on Facebook!  Let's see how many fans we can get together!
Now onto the menu for the 100th post celebration.  I decided on going back to my Israeli roots and making a Meditteranean/Israeli themed meal.  On the menu was potato and feta bourekas, shakshuka, and a carrot and cucumber salad.  For dessert I made a non-dairy pumpkin pie (I chose this dessert because it's one of the recipes I had to try out for the cooking demo). Here's a few pictures of some friends enjoying my good eats!
Potato and Feta Bourekas
(makes 18 bourekas)
1 box Pepperidge Farm Puff Pastry, thawed
8 medium yukon gold potatoes (or any potato you like)
1 pound Israeli Feta, crumbled (or any feta you like)
1 teaspoon salt
1/2 cup olive oil
1 egg + 1 tablespoon water, scrambled (for egg wash)
1 cup sesame seeds (for topping the bourekas)
all purpose flour for dusting

NOTE: You can either peel the potatoes before boiling or after.  If you choose to peel before boiling, peel and then cut into large chunks to speed up boiling process.  If you choose to peel them after, boil the potatoes whole and once cooked peel skins off.

Preheat oven to 350 degrees. Bring a large pot of water to a boil.  Once the water is boiling, place potatoes in the pot and let cook until fork tender, about 30 minutes (or sooner if they were cut in chunks). Drain and let potatoes cool slightly and peel the skins off.  Place peeled potatoes back into the hot pot along with the olive oil, salt, and crumbled feta.  Mash together until smooth.  (If you want to make a smoother consistency you can add more olive oil or butter or cream, if you like that.)  
Set potato mixture aside.  Sprinkle flour on a marble surface or piece of parchment paper.  Roll the dough to make a large rectangle and cut pastry into 9 squares. 
Place about 2-3 tablespoons of the potato mixture in the center of each pastry square.  
Fold square corner to corner, to make a triangle shape, and seal with the prongs of a fork around the edges.

 Use a pastry brush to brush on egg wash over each bourekas and sprinkle generously with sesame seeds.
Repeat all steps using the second sheet of puff pastry from the box. 
Bake bourekas on a greased baking sheet for about 40 minutes or until golden brown.  
To Freeze: Do not bake!  Freeze them on a baking sheet for about 2 hours and then transfer frozen bourekas into ziploc bags.  To cook, thaw out and bake as directed above.
Enjoy!
Stay tuned for the other recipes coming this week!

Thursday, October 14, 2010

Fruit Salad

Sometimes when I have a lot of different fruit in my fridge and either they are on their way to going bad, or it's just too much, I make a fruit salad!  Yes, fruit salads are easy, tasty, and perfect for a quick fruit-filled breakfast, snack, or dessert!  All you need to do is cut up whatever fresh fruit you have at home and sprinkle some sugar or splenda along with some OJ, or any citrus you have. That's it!

Fruit Salad (serves 1)
2 cups cut up fruit, whatever you have on hand
Sweetener, as much or as little as you need (sugar, Splenda, honey, or agave)
1/4 cup citrus juice

Place the cut up fruit in a bowl.  Sprinkle sweetener and the juice of 1 clementine or 1/2 an orange into the bowl.  Let sit for about 5 minutes, and serve immediately!

I used a clementine, because I didn't have orange juice on hand and quite frankly I have had them in my fridge for a while and was sick of eating them, so why not use their juices?  When the sugar and the citrus juices sit in the bowl with the fruit you end up getting a great fruit salad sauce!
Pomegranate Seeds, Kiwi, Blueberries, Seckel Pears, 1 packet Splenda, and the juice of one clementine!

Wednesday, October 13, 2010

Caesar Salads My Way

I come from a family that doesn't like cheese, especially parmesan cheese!!  When we go out to dinner and there's a Caesar salad on the menu, my parents ask if there's cheese in the dressing, if it's on the plate, etc.  "NO CHEESE!" they tell the waiter.  It's pretty embarrassing, but kinda funny to see two people that hate cheese this much.  Anyway, my mom makes Caesar dressing, without cheese of course, and now I make mine without cheese too!  Although I do like a little cheese on top of my salad.  My recipe is eggless and has no anchovies.  Although I don't mind adding anchovies, this time around I didn't have it on hand.  I do prefer the anchovy paste rather than the actual whole anchovies.  Also, you'll notice that in my salad there are tomatoes...I just love adding tomatoes to my Caesar salads, if you don't like them don't include them.

Caesar Salad Dressing
(serves 2)
1/2 teaspoon kosher salt
1/2 teaspoon chopped garlic
2 teaspoons Worcestershire sauce
1/2 cup olive oil
1/4 cup water
2 tablespoons white wine vinegar
2 tablespoons spicy dijon mustard

Mix all ingredients together in a mini food processor or blender.  Pour over chopped romaine lettuce, tomatoes, parmesan cheese, and croutons, if desired.  Serve immediately after dressing and enjoy!
Pre-dressing and cheese
All dressed up! 

Tuesday, October 12, 2010

Pasta with Artichokes

This is a great pasta dish to make along side some grilled chicken or fish.  It's easy to make, not much preparation, and definitely can be done in 30 minutes or less!  I actually made it twice in one week, and everyone who ate it loved it very much!  The first time I only put artichokes in it.  The second time I added portabella mushrooms, zucchini, and grape tomatoes.  Another good addition would be toasted pine nuts.  

Pasta with Artichokes
(serves 6-8 people)

1 box pasta, any kind, cooked
1/2 cup olive oil
4 tablespoons butter
1 bag frozen artichokes (Trader Joe's has a good one!)
7-8 cloves garlic, minced
1 teaspoon salt
1 teaspoon pepper
1/2 teaspoon crushed red pepper (optional)
1 cup wine
juice of 2-3 lemons
zest of 1 lemon, optional
1 bunch parsley, chopped

Start by preparing the pasta and while it's cooking do the following: In a deep large pan melt the butter and the olive oil over medium heat.  Once melted add the frozen artichokes (halved tomatoes, chopped mushrooms, and zucchini too, if you are using).  Let veggies saute for a few minutes then add the minced garlic, salt, pepper, and red pepper to the pan.  Saute for another 7 minutes and add white wine (whatever you have left in the fridge) and the juice of 2-3 lemons (and zest, if using).  Deglaze the pan and scrape the little bits off the bottom.  Add cooked pasta and chopped parsley, mix to combine and serve with a sprinkle of parmesan cheese! Enjoy!
NOTE: If you want more of a saucey sauce, add more wine, butter, and olive oil at the end.
This is the one with the extra veggies...the tomatoes end up breaking down adding to the sauce! It's really delish!

Monday, October 11, 2010

Carrot Protein Muffins

The inspiration for this recipe came from my friend who's actually having a baby this week!!  She had told me that she loves carrot muffins and would love to be able to bake a bunch and keep them in the freezer to have for breakfast.  Then my mom gave me a recipe for her carrot cake which I altered to make it a better breakfast option, with less calories than your typical bagel shop muffin and more protein.  This recipe makes about 16 muffins, I made 12 large and 12 mini muffins.  Each large muffin has about 250 calories and 9 grams protein, without the nuts.  Have a muffin and 5 egg whites (100 calories, 12 grams protein) scrambled or boiled and you have a healthy protein filled breakfast!! Here's the recipe!!


Carrot Protein Muffins
(makes about 16 large muffins)
1 1/2 cup sugar
1 teaspoon baking soda
2 teaspoons baking soda
1 pinch salt
3/4 cup high protein flour
1/4 cup flaxseed meal
1 cup all purpose flour
1 cup cooked quinoa
1/2 cup olive oil or vegetable oil or apple sauce
4 eggs
3 cups shredded and then chopped carrots (or 2 bags shredded carrots, chopped into small pieces)
1 1/2 cup chopped walnuts (optional)

Preheat oven to 350 degrees. Combine dry ingredients together in a large bowl.  Whisk to combine.  In another bowl combine the wet ingredients, except for the nuts, if using.  Whisk to combine and then slowly add the wet into the dry ingredients.  Do not overmix.  Add nuts now if desired.  Spray muffin pan with non-stick cooking spray and using a large ice cream scooper, scoop mix into each muffin tin.  Bake in the middle of the oven for about 45 minutes or until a cake tester inserted into the center comes out clean.

NOTE: If you want to have a chunky consistency in your muffin make it the way I described above...IF NOT, place all ingredients in the food processor and blend until smooth, then pour into muffin tin and bake!  
Next time, I'll definitely chop the shredded carrots!
These are the mini muffins!
Clearly I put too much batter in each muffin tin, but once they cooled off and were cut they were fine!! 
See??!  Amazing!

Friday, October 8, 2010

Mixed Veggie Quinoa Salad

Here's a recipe for a salad that I served to a bunch of people at work for lunch!  They all enjoyed it and I think you will too!  Of course, there's quinoa in it!  You know I loooovvvvvveeee QUINOA!!!  I just believe it's a great grain to add to any salad, and it's super easy to make!  So why not have it?!


Anyways, I fed 7 people with this recipe and served it for Lunch, but it could easily be the main dish if you added some grilled chicken, fish, or tuna to it!  To make it for more people add more of all the vegetables and add another cup of quinoa.  I realize I don't have a photo for you but count on me for this one!!  


Mixed Veggie Quinoa Salad
(serves about 7 people for lunch)
1 cup measure of uncooked quinoa, cooked
To cook quinoa: Combine  1 cup quinoa and 2 cups water in a pot, bring to a boil, and lower to a simmer for about 15 minutes. If there's still some water left in the pot don't worry, just drain the quinoa in a fine mesh sieve. 
2 sweet potatoes cut into a medium dice, roasted
2 zucchinis cut into a medium dice, roasted
(To roast vegetables: Preheat oven to 400 degrees, toss veggies in olive oil and sprinkle with salt and then place on a baking sheet, roast for about 20 minutes)
4 large tomatoes, cut into medium chunks
4 persian cucumbers, cut lengthwise and sliced
3 ears of RAW corn, kernels shucked 
1 cup chopped parsley
1 large bunch fresh arugula, chopped (you can substitute any greens for this)
3-4 medium balls of fresh mozzarella cheese, medium diced


Balsamic Dijon Vinaigrette
1 cup olive oil
3/4 cup balsamic vinegar
3 tablespoons dijon mustard
1/4 cup water 
2 shallot chopped
salt and pepper, to taste


Combine all ingredients for the salad in a large bowl. To make the dressing combine all ingredients in a mini food processor or blender.  Drizzle over salad and toss well to combine! Dress the salad right before serving. Enjoy!

Thursday, October 7, 2010

Garlic Bread


Garlic Bread

1 french baguette, or ciabatta bread, sliced lengthwise
6-7 garlic cloves
1/2 bunch parsley (about 1 cup)
3 tablespoons unsalted butter
1/2 teaspoon each salt and pepper
1 tablespoon olive oil

Blend all ingredients, except the bread, in a mini food processor.  Blend until smooth.  Spread parsley and garlic mixture on both sides of bread.  Place closed bread in a 350 degree oven, on a baking sheet, for about 10 minutes and then open faced for another 10 minutes.  Take out cut into pieces and enjoy with your favorite meal!!