Showing posts with label cake. Show all posts

Tuesday, June 14, 2011

CSA Week #1....and I'm Back in the Kitchen!

Between the school year ending, working out a bunch, starting a new job, and enjoying the weather it's been pretty busy around here.  This week brings my first CSA delivery!  I have been so excited about it since I signed up months ago!! If you don't know what a CSA is, click here. It's a great way to get farm fresh vegetables and fruits and support local farmers.  It's also great if you are new a neighborhood because your CSA pick up location is usually somewhere near where you live, allowing you to meet new people in the area! Plus it forces you to eat fresh and healthy! All great things!

This week I got the following:
Rhubarb, Radishes, Red Sail Lettuce, Buttercrunch Lettuce, Mizuna, Suehlihung Mustard, Garlic Scapes, and Sage with Edible Flowers

Some of the items are familiar and some not.  The good thing about not knowing an ingredient is going online and researching ways to use it! There are many places to find recipes. My CSA, which comes from Stoneledge Farm has it's own blog, so does the 92Y (where I pick up my share), and Tastespotting are all great resources for finding new recipes. Another farm that I came across online that has a blog with more great recipes is Free Bird Farm. Check them out!

Today I share with you a recipe I found on Food Woolf.  I adapted it a bit, making it completely non-dairy.

Rhubarb Berry Crostata
For the Crust
1 cup all-purpose flour
1/2 cup whole wheat flour
1  1/2 tablespoons sugar
1/2 teaspoon kosher salt
1  1/2 sticks pareve unsalted margarine, cubed (can substitute butter)
1 large egg
1 teaspoon non-dairy milk (I used unsweetened vanilla almond milk, soy works too)
For the Filling
1/4 cup cornstarch
3 tablespoons water
2 teaspoons vanilla bean paste or extract
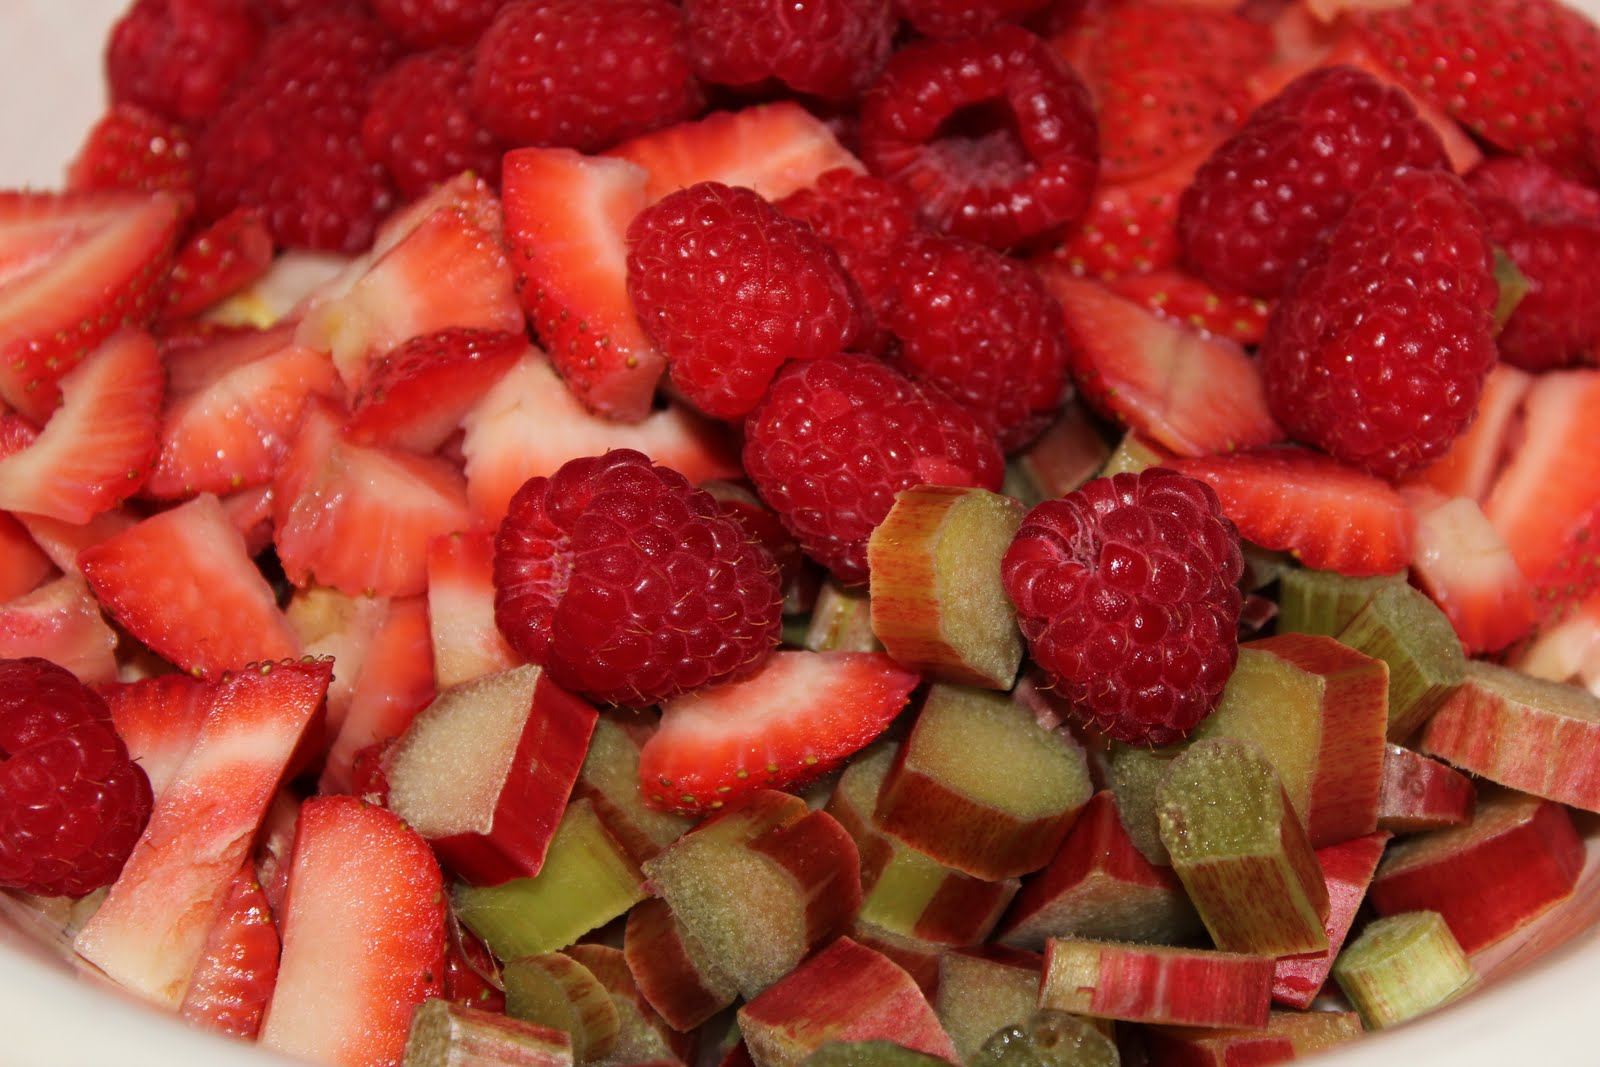
3 cups sliced rhubarb (about 1/2 inch thick)
1 small container of raspberries
1 cup slices strawberries
2/3 cup sugar
1 large egg, beaten
Raw Sugar or Turbinado, for sprinkling.

To make the crust: Combine the flours, sugar, and salt in a food processor.  Pulse to combine.  Add cubed butter and pulse until it forms pea-sized pieces.  In a small bowl whisk egg and milk, then pour it to the flour mixture in the processor.  Pulse until moist clumps form.  Scoop dough out and make into a round flat circle. Cover with plastic wrap and let chill in the fridge for at least 1 1/2 hours. (Dough can be made up to two days ahead.)
To make the filling: In a small bowl dissolve the cornstarch and water, set aside. Combine the rhubarb, berries, and sugar in a saucepan.  Cook over medium heat and stir often.  Sugar will dissolve and fruit juices are released, this takes about 4-5 minutes.  Stir in cornstarch liquid and bring to a boil. The rhubarb will not be tender at this point.  Transfer mixture to a bowl and let cool for about 30 minutes.
Preheat oven to 400 degrees.  Roll out dough onto floured surface (I used a silpat) until it reaches about 12 inch circle. Brush dough with beaten egg.  Mound the filling in the center and spread it out leaving about a border enough to fold the edges to form a crust.  Gently fold back the edges, about an inch or more, over filling, pleat as necessary.  Place silpat or parchment paper on a baking sheet and bake until crust is golden brown and filling is bubbly, about 45 minutes.  Let cool on a baking rack, slice in wedges, and enjoy!

Tuesday, May 3, 2011

Trim Down Tuesdays: Q&A + Cheesecake Light

Welcome back to Trim Down Tuesdays with Karen Moreno, Feed Your Sister's own nutritionist!  Every week she answers questions from you, the readers, and posts a yummy and healthy recipe for you to try! Here's this week's question...

How much salt do we really need? What are some hidden salty foods that we should be aware of? What is the best way to de-bloat and flush out the excess salt after eating a salty meal like sushi or Chinese?  What are the best foods to eat to help with the de-bloating??

The latest salt recommendations according to the American Heart Association that came out in 2011 are “that everyone--adults as well as children--limit their daily sodium intake to less than 1,500 mg daily.”  That’s less than 1 tsp of table salt.

“Sodium is added to most processed foods, often in huge amounts, to enhance flavor. What many people don't know is that most of us get enough sodium from the fresh foods we eat and don't require additional sources.”

Hidden salty foods include: tomato soups, any canned soups, condiments such as soy sauce, chicken broth, condiments, canned or frozen foods, and prepared mixes such as seasoned rice mixes.

So, what are the best foods to eat to help with the de-bloating?
WATER WATER WATER!!! To help flush out your system. Potassium rich foods are also great because they help counteract some of sodium’s harmful effects on blood pressure. Potassium is found in fruit and veggies. Some high potassium foods include sweet potatoes, yogurt, and bananas.

Here are some tips to lower your salt and sodium intake:
  • Don’t buy foods with more than 300 mg sodium per serving
  • Look for foods that are labeled “low-sodium,” “sodium-free,” “no salt added,” or “unsalted.” Check the total sodium content on food labels. Be especially careful of canned, packaged, and frozen foods
  • Remove the salt shaker from the table.
  • Don’t cook with salt or add salt to what you are eating. Try other spices or herbs for added flavor such as pepper, garlic, lemon, basil, or parsley. Be careful of packaged spice blends as these often contain salt or salt products (like monosodium glutamate, MSG).
  • Avoid foods that are naturally high in sodium, like anchovies, meats (particularly cured meats, bacon, hot dogs, sausage, bologna, ham, and salami), nuts, olives, pickles, sauerkraut, soy and Worcestershire sauces, tomato and other vegetable juices, and cheese.
  • Take care when eating out. Stick to steamed, grilled, baked, boiled, and broiled foods with no added salt, sauce, or cheese.
  • Use oil and vinegar, rather than bottled dressings, on salads.
Source: American Heart Association


Here's Karen's recipe for this week! 
You know cheesecake is no diet food, but consider this: Just one slice at some of the more popular restaurants can be 1200 calories. That’s insane! Plus, I always find typical American cheesecake tastes too heavy, so I came up with my own recipe. The base of it is an Israeli cream cheese that gives the cake a light and fluffy texture. It’s called Tnuva Creamy Soft Cheese 5%. You can find it in specialty stores (sometimes it’s sold under the name Normans) or online at Avi Glatt. If you are in NYC, most kosher markets as well as Fairway carry this cheese product. As for the rest of the recipe, feel free to individualize it. You can add cookie dough to the base, light Hershey’s syrup on top, light Reddi-wip, or even just plain strawberries for added decoration and flavor. Whatever way you like, have your cake and eat it, too! 
Cheesecake Light
(Makes 16 servings)
6 eggs, separated
1½ cups sugar
1 lemon, zest and juice
3 (9.7 ounce) containers Tnuva Creamy Soft Cheese Spread, 95% Fat Free
3 tablespoons flour
3 tablespoons instant vanilla pudding (powder) 

Preheat oven to 325ºF degrees. Separate egg whites from egg yolks. In a bowl, beat egg whites with 1 cup of the sugar until stiff.  In a separate bowl, beat egg yolks, the other 1/2 cup of sugar, cheese, flour, pudding powder, lemon zest, and the juice from that lemon until well blended. Add egg white mixture to the other mixture by fold it in with a spoon or spatula, until evenly incorporated. Pour batter into a round aluminum springform baking pan.
Bake for 1 hour and 15 minutes or until the cake rises high and the top turns brown. Turn off the oven. Let the cake sit in it with the oven door open for 20 minutes. Take the cake out of the oven and let it cool for 2 hours. Refrigerate overnight to set. Serve cold.

Nutrition content:
Per serving (1 slice, 1/16 of cake): 165 calories, 3 g fat, .6 g sat fat, 22 g carbohydrate,
0g fiber, 4 g protein, 93 mg sodium
-Karen Moreno, RD, CDN

Friday, April 1, 2011

Chocolate and Cinnamon Swirl Coffee Cake

This is another recipe I saved onto my desktop, from Chocolate Shavings. My desktop is filled with recipes I want to try but don't have time to make! I thought this would be a great thank you cake to make for Joey, the friend who designed my new logo!  Don't you love it!  I do!! Thanks Joey!  I also made him these chocolaty cookies.  I found that this recipe makes a lot of batter. So I had filled my loaf pan and then still had extra crumb topping and batter to fill up a ramekin and coffee mug, so I filled them, and baked them too! Thank god I had a cookie sheet under my loaf pan while it was baking, because literally I had a coffee cake explosion. Here's a picture of what the coffee cake baked in the mug looked like to give you an idea...looks just like a cup of coffee, doesn't it?! 
Chocolate and Cinnamon Swirl Coffee Cake
(recipe source: Chocolate Shavings, adapted from the Baked cookbook, although I made my cake in a loaf pan)
Crumb Topping
3/4 cup all-purpose flour
3/4 cup packed dark brown sugar
1/2 teaspoon salt
3/4 cup of hazelnuts
6 tablespoons cold unsalted butter, cut into 1 inch pieces

Chocolate Cinnamon Swirl
1/2 cup sugar
1 teaspoon dark unsweetened cocoa powder
1 1/2 teaspoons cinnamon

Cake
3 1/2 cups all-purpose flour
1 teaspoon baking powder
1 1/2 teaspoons baking soda
1/2 teaspoon salt
2 sticks unsalted butter, softened
2 cups sugar
4 large eggs
16 ounces fat free sour cream
1 1/2 teaspoons pure vanilla extract

Crumb Topping:
Put the flour, sugar, and salt in bowl of food processor and pulse to combine. Add the hazelnuts and pulse until they are finely chopped and incorporated. Add the butter and pulse until mixture looks like coarse sand. Cover and refrigerate.

Chocolate Cinnamon Swirl:
Mix ingredients in a small bowl and set aside.

Sour Cream Cake:
Preheat the oven to 350° F. Butter a 9×13-inch baking pan (whatever you use make sure not to fill it more than half way, the cake will overflow!!!) Sift together the flour, baking powder, baking soda, and salt together in a medium bowl.
In the bowl of a stand mixer fitted with the paddle attachment, cream the butter until smooth. Scrape down bowl and add sugar. Beat until the mixture is light and fluffy. Add the eggs, one at a time, beating well after each addition and scraping bowl as needed.
Add the sour cream and vanilla and beat just until incorporated. Add the dry ingredients in three additions, scraping down the bowl before each addition and beating only until each addition is just incorporated. Do not overmix.
Pour one third of the cake batter into the prepared pan. Use an offset spatula to spread batter evenly in pan. Sprinkle half of the chocolate cinnamon swirl mixture over batter and a third of the crumble topping, covering the entire surface of the batter. Spoon half of remaining batter over the swirl mixture and spread it evenly. Top with remaining swirl mixture and crumble topping, then the remaining batter, and spread the batter evenly. Sprinkle the remaining crumb topping evenly over the top of the batter.
Bake in the center of the oven for one hour, or until a toothpick inserted in the center of the cake comes out clean. Let the cake cool on a wire rack for 30 minutes.

Sunday, January 23, 2011

Nutella Pound Cake

I was invited to a friend's house for some chili, they have a party every year!  I wanted to bring something that everyone could enjoy for dessert and had seen this recipe on The Italian Dish Blog and it looked like the perfect thing to make!  Chocolatey and delicious, this Nutella Pound Cake was gone in about 15 minutes, next time I will double the recipe for sure!!  Even the kids enjoyed, just make sure no one has a nut allergy!!

Nutella Pound Cake
(makes 1 loaf)

for a printable recipe, click here
1-1/2 cups all purpose flour, plus more for dusting
1/4 teaspoon salt
3/4 teaspoon baking powder
2 sticks unsalted butter, room temperature
1-1/4 cups sugar
4 large eggs, at room temperature
2 teaspoons pure vanilla extract
One 13-ounce jar Nutella
Preheat the oven to 325 degrees.  Lightly grease and flour a 9x5 inch loaf pan, tapping out any excess flour.  (I like to brush the loaf pan with melted butter, lay a cut sheet of parchment paper on the bottom of the pan, butter that and then flour the entire inside and then tap out the excess.  It ensures that your bread comes out perfectly.)  In a medium bowl, whisk the 1-1/2 cups of flour with the baking powder and salt and set aside.
In a large bowl beat the butter with the sugar at medium-high speed until fluffy, about 3 minutes.  With the mixer at medium-low speed, add the eggs, one at a time, making sure each one gets incorporated before adding the next one.  Add the vanilla extract.  Add the flour mixture in 3 batches, beating at low speed between additions until incorporated.  Continue to beat for 30 seconds longer.
Spread one-third of the batter in the prepared pan, then spread half of the Nutella on top.  Repeat with another third of the batter and the remaining Nutella.  Top with the remaining batter.  Lightly swirl the Nutella into the batter with a butter knife.  Do not overmix.
Bake the cake for about 1 hour and 10 minutes, until a toothpick inserted in the center comes out clean.  Let the cake cool in the pan for 15 minutes.  Invert the cake onto a wire rack, turn it right side up and let cool completely, about 2 hours.  Cut the cake into slices and serve.
The pound cake can be  kept in an airtight container at room temperature for up to 3 days.  It can also be wrapped tightly and frozen.

Some friends enjoying the Nutella Pound Cake!

Monday, December 6, 2010

Nutella Chocolate Tart

I saw this recipe while reading the many blogs I read daily. It looked very simple and delicious.  Not sure if you've noticed but I've been on a baking kick lately...I decided to make this and bring it for dessert at my family's Chanukah Lunch yesterday.  It took me less than an hour to prepare this yummy decadent tart!  If you are allergic to nuts leave out the Nutella!  Some other variations I thought could be good in place or in addition to the Nutella is peanut butter, banana slices, or some whipped cream!  You can also make this tart with a chocolate or graham cracker cookie crust.  The options are truly endless! 
Nutella Chocolate Tart
(adapted from Baking Kids Love by Cindy Mushet and Sur La Table)
For the crust:
1/2 of the dough from this recipe or this recipe (You can use butter, vegetable shortening, or margarine.)
For the filling:
4 ounces semi-sweet good quality chocolate (I used Ghiradelli)
2/3 cup heavy whipping cream
1 tablespoon vanilla bean paste or vanilla extract
1 shot of espresso or strong coffee OR 1 teaspoon of instant espresso powder
3/4 cup Nutella (Chocolate Hazelnut Spread)

Preheat the oven to 350 degrees.  Grease a small tart pan with non-stick cooking spray. (If you want to make a larger tart use all the dough from the crust recipe and double the chocolate filling.) Use fingers to press dough into the greased tart pan making sure to have the dough along the sides of the pan as well.  Blind bake the tart shell by placing a piece of aluminum foil or parchment paper over the dough and pour rice or beans on top to weigh the dough down while baking.  Blind bake for about 10 minutes then remove beans and aluminum and bake for another 10 minutes or until edges are light golden brown.  Let tart shell cool completely. Put aside.
Blind Baking
Meanwhile, chop chocolate and place in a bowl.  In a sauce pan bring the heavy cream to a soft simmer over medium heat.  Pour warm cream over chopped chocolate, espresso, vanilla, and nutella. Let stand for a few minutes until chocolate gets soft then whisk mixture until smooth.  Pour chocolate ganache into cooled tart shell and spread to the edges.  Place in fridge for at least 3 hours. Tart and filling can be prepared 2-3 days in advance, keep uncovered in the fridge. Serve at room temperature with a cold glass of milk, coffee, or hot chocolate!

Wednesday, October 27, 2010

Pistachio Cake

This recipe is very much like the Easiest Chocolate Cake I made a few weeks back.  Which by the way got rave reviews from the people I baked it for.  I am baking this recipe for the same people, we'll see what they think!!  I tasted it and it's moist, a nice green color, and deliciously nutty!! If you love pistachios you will be sure to love this one!!!

Pistachio Cake or Muffins
1 box Classic Yellow Cake mix
8 oz. whole shelled pistachios, grounded. (Be sure to reserve 1/2 cup for decoration on top of the frosting)
3 eggs
1/3 cup vegetable oil
1 1/3 cup water
1 package Pistachio Flavor JELL-O (not prepared)

Preheat the oven to 350 degrees. Put aside 1/2 cup of the ground nuts aside for later. Mix the rest of the ingredients together in a bowl, whisk to combine well, and pour into a loaf pan, muffin tins, etc.  Bake until a cake tester comes out clean and golden brown.

I made 24 mini muffins, and still had left over batter for a 9x9 inch brownie pan. I cooked the mini muffins for 25 minutes and the cake for about 40 minutes. I frosted the mini muffins with Vanilla Bean Frosting.  The frosting is made with confectioner's sugar and Earth Balance Natural Shortening, it's like a vegan version of butter for baking. (Make sure to get the green package, the other one contains salt.) 
I am not frosting them yet, because I want it to be fresh, but here is the recipe for the Vanilla Bean Frosting.  It can be made vegan if you use non-dairy soy milk and vegan natural shortening!!

Vanilla Bean Frosting
2 cups confectioner's sugar (if you want a really sweet icing add more sugar, to taste)
1 cup butter OR Earth Balance Natural Shortening (at room temp.)
1 teaspoon Vanilla Bean Paste (OR vanilla extract w/the beans of a vanilla bean scraped out)
1 tablespoon milk or soy milk (can be vanilla flavored)

Blend ingredients together and frost cupcakes just before serving.  Sprinkle some ground pistachios on top! (You should have about 1/2 cup leftover from the cake recipe!)

Wednesday, October 6, 2010

Easiest Chocolate Cake

This is a recipe my mom always makes when she's short for time and wants to serve something homemade, or shall I say semi homemade!  It's super easy, and you can make the recipe in a loaf pan, bundt pan, or cupcakes.  Obviously the cooking time will vary.
Easiest Chocolate Cake
1 box Duncan Hines Devil's Food Cake Mix + Ingredients to prepare cake mix (eggs, oil, water)
1 box Jello Pudding, Chocolate Flavor
1 teaspoon vanilla bean paste or vanilla extract
1/2 cup mini chocolate chips (optional)

Preheat oven to 350 degrees.  Spray loaf pan (or whatever you choose to use) with non-stick spray.  Follow the back of the cake mix to prepare batter. Add, vanilla and pudding package to the batter.  Mix well.  If you choose to make the cake even more chocolatey, add chocolate chips now and mix with a spoon till well incorporated.

Pour batter into loaf pan and bake for 50 minutes.  Lower oven to 325 degrees and bake another 20 minutes or until cake tester comes out clean.

If you use any other pan, see back of cake mix bow for baking times.  A bundt pan should take about 50 minutes or so.

Enjoy!!

Tuesday, October 5, 2010

Safta's Apple Cake

Safta means grandma in Hebrew.  This is a recipe that has been in my family since I was little.  My grandma used to make it all the time, and I actually never liked it as a young child.  Now my grandma lives in Florida, so my cousin and mom have continued the tradition of making this cake. It's a family favorite for sure!!  I have gotten to like it as I've grown older, and now I am sharing it with you!  Hope you enjoy it as much as my family does!

Safta's Apple Cake
For the Dough:
2 sticks softened margarine (If you are Kosher make sure it's the Fleischman's Pareve Margarine)
3/4 cups sugar
1/2 tablespoon vanilla bean paste or vanilla extract
1 1/2 tablespoons fresh lemon juice
1 egg
2 cups + 1 tablespoon all purpose flour

Preheat oven to 350 degrees.
Combine all ingredients in a food processor and pulse until combined into a dough.
Spread half of the dough on the bottom of a well greased spring form pan (could be square or round).  To help spread the dough, grease your hands with non-stick cooking spray or vegetable oil to prevent the dough from sticking all over.  Try to make the bottom cake layer as even as possible.  Place the spring form pan and dough mixture in the food processor in the fridge while you prepare the apple filling.
For the Apple Filling:
4-5 Granny Smith apples, peeled, cored and grated using the food processor
1/4 cup fresh lemon juice
1/2 cup sugar
1 teaspoon cinnamon (optional)
1/4 cup flour, OR graham cracker crumbs, OR bread crumbs (to absorb apple juices while baking)

Use the food processor, fitted with a grating blade, grate the apples.  Place grated apples in a bowl along with sugar, lemon juice, flour, and cinnamon.  Mix until well coated.  Use your hands to squeeze out the juice from the apples and place on top of bottom dough layer.  Repeat this step until all the grated apples are evenly spread in the spring form pan.  
Get the dough from the fridge and with greased hands, spread the rest of the dough on top of the apples. Use a fork to poke holes in the cake to allow the steam escape while cooking. You can also use a knife to monogram the cake, like I did (see photo below) when I made this cake for a friend.   
Sprinkle top layer generously with sugar.  Place in oven and bake for about an hour or until golden brown.  Let cool slightly before taking a knife to loosen the edges of the cake from the pan.  Open spring form pan and use large spatula or knife to loosen bottom and slide onto serving platter.  Serve at room temperature, slice, and enjoy. 
Note: If there are leftovers the cake should be refrigerated.


A monogrammed cake makes a great gift to bring to someone's house for dinner!

Wednesday, March 31, 2010

Matzoh Cake

Matzoh Cake with Sprinkles
(makes one layer cake)
For the Chocolate Frosting (needs to be made at least one day ahead)
4 oz bittersweet chocolate chopped
3/4 cups water
2 cups sugar
4 tablespoons cocoa powder
4 sticks unsalted margarine
2 tablespoons of vanilla extract (if you like you can add 2 tablespoons of rum extract too)
4 egg yolks
For Assembly
2 cups Manischewitz wine
Room temperature chocolate sauce from day before
10-12 wet Matzohs
Sprinkles for decoration
1. Melt the first 5 ingredients in a pot until dissolved. In a separate bowl whisk the vanilla and yolks together. Temper the egg mixture by pouring some of hot chocolate mixture into the yolks slowly. Then add the yolks back into the hot chocolate mixture.
2. Refridgerate over night and assemble the matzoh cake the next day.
3. Take chocolate sauce out of fridge and let it come to room temperature.
4.To assemble the cake wet a 10-12 matzohs with water and place underneath a clean kitchen towel so it stays moist. Place one matzoh on a plate and sprinkle it with Manischewitz wine using a spoon and then spread the chocolate sauce over the matzoh. Repeat this step until all layers are used. On the top layer spread chocolate sauce and sprinkles!

Thursday, March 11, 2010

My familia gets together

The flank steak that was marinated in olive oil, salt, and pepper for over 24 hours. It was deeelisshh!
My bro cooking up some potatoes with garlic and parsley, par-boiled first and then roasted in the oven til crisp! Also delish.
My meal. The steak and potatoes were adapted recipes from David Tanis' cookbook, A Platter of Figs and Other Recipes.
The salad was simple, just some mixed greens and shredded carrots. The dressing was olive oil, lemon juice, a pinch of sugar, rice wine vinegar, and salt and pepper.
This is my brother's cat, Grizette. I'm allergic to her and she gave me hives. Not a pleasure at all during dinner, but being with the family was worth all the suffering. Thanks Grizette!
From left to right, dad, mom, other brother, and my cousin from Israel on my dad's side...can't you tell??
My gorgeous sister in law.
My mom and brother with the gorgeous coconut cake I made.
We ate half of it. When I got back to my apartment I served 2 slices to my doormen, they were both extremely impressed and very thankful. And the rest I'm bringing to school, in my cool cake carry case, for my colleagues.

Wednesday, March 10, 2010

7 minute frosting is not easy...

So I get home this afternoon from work and am really excited to get busy making my cocount layer cake for the anniversary/birthday party dinner tonight at my brothers apartment...well let me tell you, this stuff ain't easy. I do not recommend beginner bakers to attempt this recipe. WARNING: DIFFICULTY LEVEL is HIGH!
So as it was I decided to make my life a little simpler by using a store bought white cake mix, that went great, easy peasy! I did that last night. I followed the Everyday Baking recipe, linked above. I started by placing all the ingredients into a heatproof bowl over a simmering pan of water, like they told me. I started beating and timed 7 minutes, like they told me to do. So the egg whites were cooking and getting nice and white, which is supposed to happen. When the 7 minutes were up the peaks were still not stiff, UH OH! I continued to beat the mixture for another 10 minutes, still no peaks, not even soft one! WTF!?!?! I was really frustrated at this point. I figured, you know what, let's try it again, maybe I did it wrong. Ahhh, here goes trial #2...
So again, I put all the ingredients in the heatproof bowl and start blending away, after 7 minutes no freaking stiff peaks, let alone soft peaks. I take a deep breath and continue to beat. Meanwhile my kitchen looks like a dynamite hit it, there are white specks of icing all over my stovetop and surrounding walls. Of course I wasn't wearing an apron and my jeans were all speckled white too! Great! So now my kitchen and I are all dirty and I still have NO PEAKS!
So I quickly google how to make egg white frosting, just to see if there are any other recipes that are somewhat similar to what I was trying to make, and they all basically were the same. So now I had to really think. I started to think rrrrrrrreeeeeaaaaalllllllllllll hard. I looked in the fridge to see if I had more eggs, cause I just wasted 6 whole eggs in the process. Luckily I did have just enough for one more batch, trial #3. They say three times a charm, right? Well, at least no one can say I didn't try...here goes nothing...
I decided to omit the corn syrup completely and cut down the sugar to a cup (the other two batters were too sweet anyway and I was running out of sugar). I also cut down the amount of water from 1/3 to 1/4 of a cup. I put 2 teaspoons of cream of tartar instead of a 1/2 teaspoon, because I know that cream of tartar is supposed to make things thick, so I didn't think it could hurt this time around. Below is the recipe, adapted from Everyday Baking's recipe, that I used for trial #3, and you know what...IT ACTUALLY WORKED AND STILL TASTED DELICIOUS!
Seven-Minute Frosting, My Way
3 large egg whites
2 teaspoons cream of tartar
1/4 cup cold water
1 cup sugar
1. In a medium saucepan, bring 2 inches of water to a simmer.
2. In a large heatproof mixing bowl, combine egg whites, cream of tartar, water, and sugar.
3. Place bowl over simmering water (it should not touch water); with a handheld mixer, beat on high speed until stiff peaks form, about 7-10 minutes.
4. Remove bowl from heat; beat 3 to 5 minutes more to cool. Use immediately
This is the cool cake carrier I got yesterday at Bed Bath & Beyond. No one is touching this cake until it's time for dessert.

Thursday, March 4, 2010

Anniversary/Birthday Cake/Salad

So today is my dad's birthday, yesterday was my parents 36th wedding anniversary, and on Tuesday is my brother and his wife's 1st wedding anniversary. The family, sans my sister, who's in college, is getting together on Wednesday evening for some home cooked grub at their place.
I know for sure I am going to make a Coconut Layer Cake that I once sampled at a friend's bridal shower in Connecticut. The cake was bought from the Sono Baking Company. The guy who started the bakery, John Barricelli, used to work at Martha Stewart Living Productions in Westport, CT. Martha Stewart Productions produces the magazine Everyday Food and the show on PBS called Everyday Baking. The Sono Baking Company is going to be sold at bookstores March 9th!! I'm super excited to get a look at what else is inside!! After putting two and two together we got our hands on this recipe, see link above. I've never seen a group of ladies eat a whole cake at a bridal shower and actually enjoy it and leaving wanting more. I think I thought about that cake for several weeks after the shower, and I'll tell you this...I wasn't the only crazy one still salivating at the thought of this cake.
I'm also going to make this salad, I saw the recipe on another blog I follow called, Big Girls, Small Kitchen: A Guide to Quarter-Life Cooking. What I liked about it was the dressing, because really what's a salad with no dressing?? Not much! I love that the recipe calls for avocado and lots of vibrant flavored herbs such as basil and parsley. P.S. I SUGGEST NEVER USE CURLY PARSLEY. Not even sure why markets even bother selling it. Have you ever seen a recipe that specifically calls for curly parsley over the flat leaf kind?!!?!? I thought so.
Green Goddess Dressing

½ medium avocado 3 tbsp white wine vinegar 1 garlic clove 1/2 lemon, juiced 1 tbsp mayonnaise 2 tbsp parsley, chopped 2 tbsp basil, chopped 2-3 scallions, chopped ½ - ¾ cup olive oil ½ tsp salt and pepper (to taste)

Combine all ingredients in a food processor and pulse to combine. Stream in the olive oil gradually and blend until the mixture becomes light and frothy. Taste for seasoning. Toss with your leaves of choice.

So as an edible gift to my parents, brother, and his wife I'd like to bake this cake. I will definitely photograph the meal and all the food that's served. And maybe, just maybe, I'll be able to capture a snapshot of my family, surely a shot not to be missed! Be sure to stay tuned, this could get interesting!
Related Posts Plugin for WordPress, Blogger...